
I’m a sucker for a new project
Especially if it looks difficult, offers the chance to try something new, or gives me the opportunity to buy more tools.
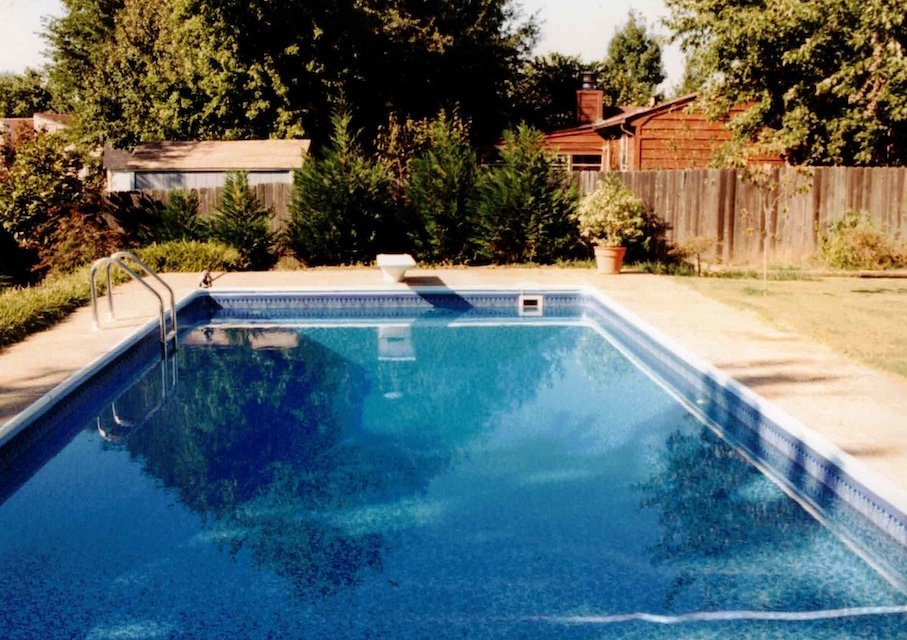
Once, about 30 years ago, I got several quotes from contractors for building us an in-ground swimming pool. I looked at the designs and told Mary, ““Hell, I could build one. There’s nothing to them!”
A couple weeks later, Mary showed me a small ad she had clipped from a magazine:
Build your own swimming pool!
Send for our free video.
A week or so later, I had a VHS tape that showed a couple guys digging a hole (in what I later decided had to be peat moss), building a wooden frame, and eventually installing a vinyl pool liner.
Easy peasy. I bought the plans. Did the estimates. We started digging.

We later hired a guy with a backhoe.
Four months later, we had a pool.
There have been other, equally crazy projects:
- Cutting the front off an old farm house, having a two-story addition built, and then spending 10 years finishing it.
- Selling or giving away almost everything we owned, including that farm house, and moving to Portugal.
- Selling or giving away almost everything we owned in Portugal and moving back to the US, then buying a 60 year old house that needed a complete renovation.
To her credit, in each of these ventures, Mary has been right there with me. Wielding a shovel, swinging a hammer, toting suitcases back and forth across the Atlantic, stripping five layers of wallpaper off the walls.
Our most recent project was actually Mary’s idea. Back at the end of March, she said, “Hey, I found plans for some mid-century modern bookshelves on Etsy. Why don’t you build them for us?”
Sure. Why not?
Four months later, I just finished them. Here’s how it went.
It was easy, and cheap, to get started
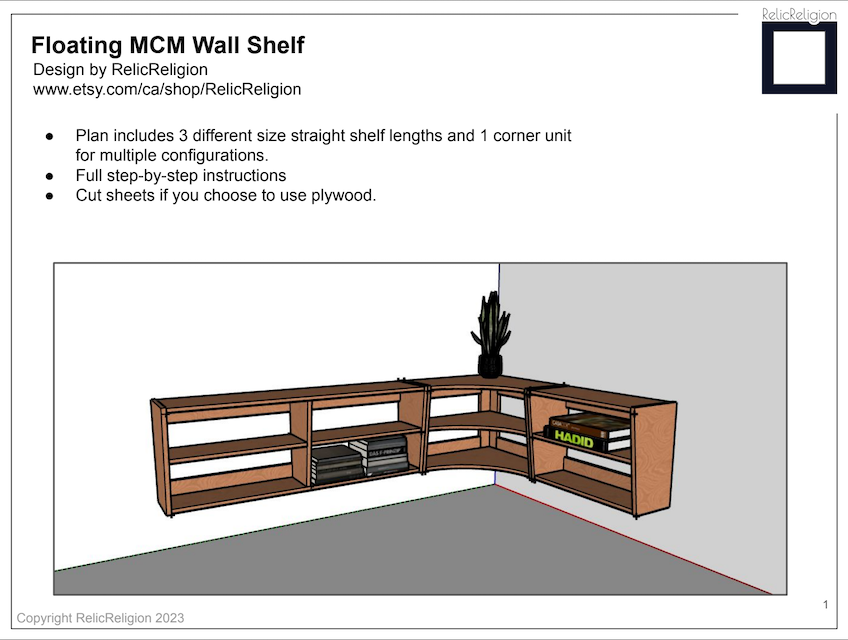
On March 29, we spent $6 to buy a pdf file of plans for “Floating MCM (Mid-Century Modern) Wall Shelf” from RelicReligion on Etsy.com.
This turned out to be the cheapest part of the whole project. I printed the plans, looked through them, and put them aside. I had other things in the works. Some new consulting work, hanging the “Plumeria” lamp, clearing brush around the lot, and hanging three ceiling fans kept me busy for several weeks.
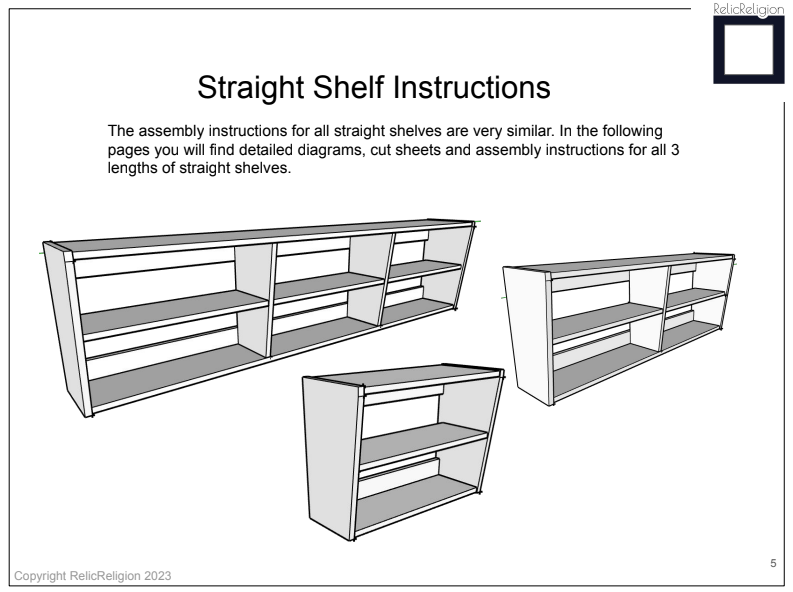
In early May I picked up the plans again and started thinking about how to build the bookshelves. The designer had detailed four different configurations. One was a shelf that fit in a corner, with concave rounded shelves. The others were straight shelves – a small, medium, and long version. They were designed to be wall mounted, appearing to float.
I sketched out a layout for my study and for our living room. Two straights and a corner unit in the study, three and a corner in the living room. Then I worked out a master cut list. The designer had included drawings to show how each shelf could be cut from a sheet of plywood, but there was a lot of waste. I planned to use ¾” birch plywood – cabinet grade. That stuff isn’t cheap, so I wanted to be as efficient as possible.
After changing some dimensions to better utilize the plywood, I figured that I could build all the units from 4 sheets of plywood.

If I can’t use a spreadsheet, I won’t do the project!
I planned to build the bookshelves for the study first, where any mistakes wouldn’t be as visible as in the living room.
At the end of May I rented a pickup truck for a day and put in my order for materials. I bought 5 sheets of plywood, so I’d have an extra – “just in case”. But at $85 a sheet, I didn’t want to make many mistakes!
Cutting and fabricating
In early June, I set up shop in our garage and started cutting the pieces. It took three weeks of part-time effort to get them all done. During most of the month, I could only work in the morning, because by noon the temperature was well above 90ºF / 32ºC.
Mary helped me maneuver each sheet of plywood for the initial cuts. The sheets are heavy and awkward to handle. I had intentionally planned for the first cuts to be slightly bigger than the plans called for so I could run them through the table saw a second time when they were a more manageable size.
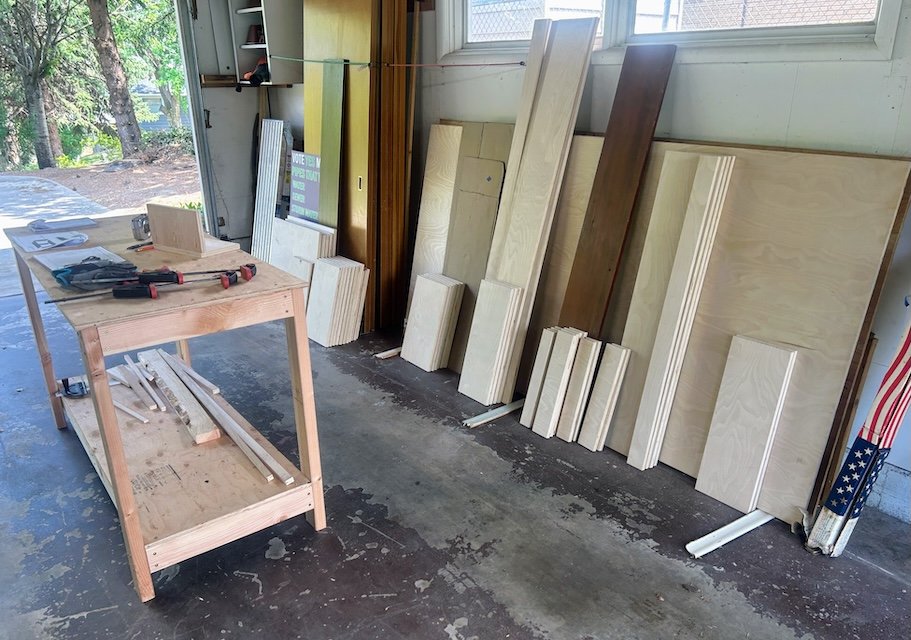
There were over 60 individual pieces to cut. Every piece got labelled so I could keep track of which piece went to which unit.

Many of them had to be drilled for pocket screws – a type of screw used in furniture that is hidden from view.
And every edge that would be exposed got birch banding applied. The banding is a thin veneer that is slightly wider than the plywood is thick. It has an adhesive backing that melts when a clothes iron is pressed on it. Once the adhesive cools and sets, the excess banding gets trimmed off with a special cutter or a razor knife.
The bookshelves are designed with a taper from top to bottom, so every end piece and the middle dividers had to be cut at an angle on one side. I built a taper jig for my table saw to help make the cuts accurate and repeatable.
Cutting corners (literally)
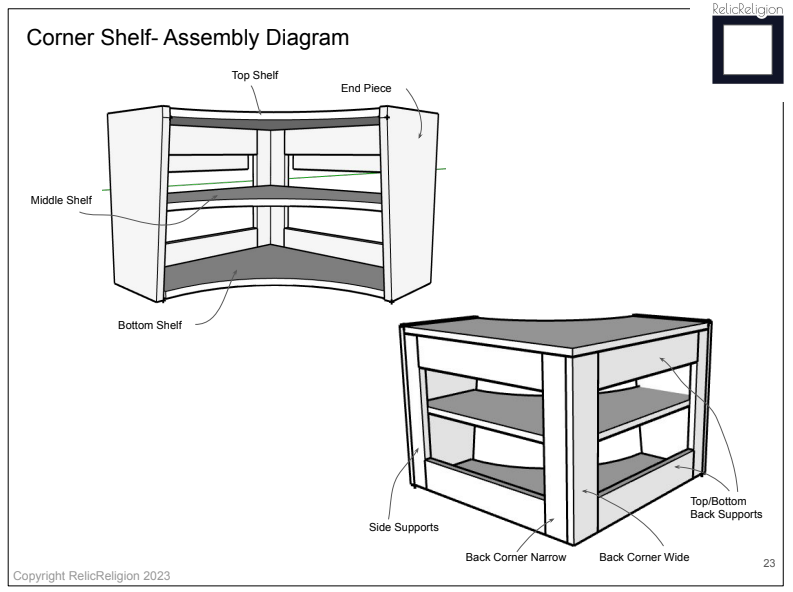
The biggest challenge in this phase was the curved cuts on the corner shelves. I don’t have a bandsaw and a handheld jig saw would not produce the clean curve that I wanted. My son and I brainstormed over this and came up with a plan to build a jig that would hold a router and pivot it over the workpiece, creating the curved cut.
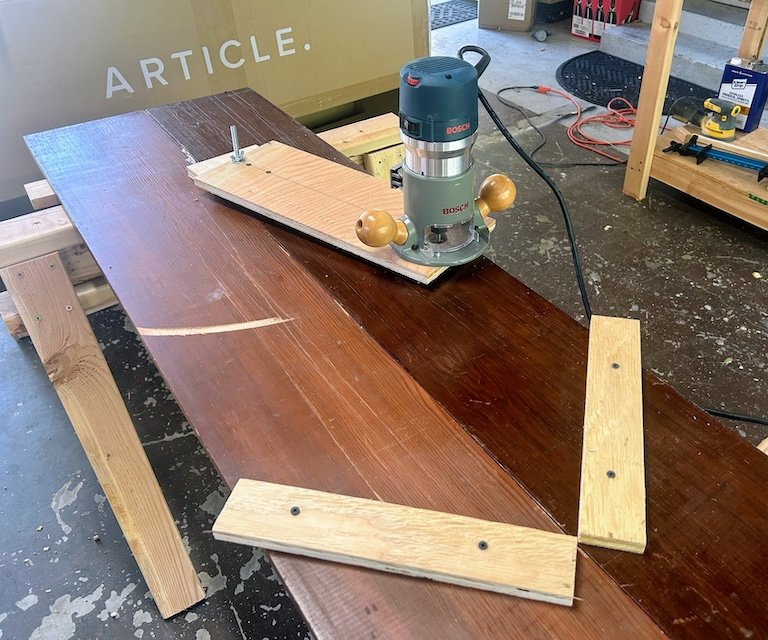
It took me a couple days to work out the jig, and the first cuts I made in some scrap wood were disappointing. There was too much “slop” in the jig – meaning the router was not tracking precisely as it pivoted. Due to the thickness of the plywood, I had to make two passes – each one cutting half the thickness – so I needed precision.
I added a metal collar to take up the slack around the pivot bolt. That did the trick! I could make two cuts accurately in each shelf.
Each corner unit had three shelves. Each shelf had a different radius cut. It took a fair amount of trial and error to get the jig adjusted for the different cuts. But once I got it dialed in, it worked perfectly.
Mike makes the second cut on one of the shelves
Finding the right finish
The birch plywood is a very light colored wood, so we knew we needed to stain it. While we’ve painted a lot of things in our lives, we hadn’t worked with stain before. So we spent some time watching YouTube videos and reading tutorials. We brought home a color chart from one of the stain manufacturers and puzzled over what color to choose.
We bought a quart of polyurethane-based stain, labelled “Pecan”. We also bought the polyurethane conditioner that was supposed to make the stain go on more evenly.
This is where we made a major mistake. Instead of trying the finish on a scrap piece of wood, we applied it to the bottom shelf and end pieces of one of the bookshelves for the study. When it dried and we carried the pieces into the study to check the look, we both shook our heads. It was too red!
The good news was that it was now early July and our daughter Katie had flown out from Indianapolis to spend July 4th week with us. Katie had done some woodworking and had experience with stains. She helped us do an experiment to find a better finish. We picked out 3 different colors of oil-based stain and also bought a can of Danish oil.
Back in our basement “lab”, we tried multiple iterations of the products – applying them with and without the conditioner, applying multiple coats, and applying one or two coats of polyurethane sealer.

In the end, we chose a color called “English Chestnut” and settled on a 5 coat process: one coat of conditioner, two coats of stain, and two coats of poly. Pretty labor intensive, but we liked the way it looked.
A brief side note…
It was about this time that Mary suggested we hire a project manager, because she wanted the project to be completed in two weeks. She said she knew one that would work cheap. I was a bit puzzled by this suggestion, until I realized that she was planning to be the PM.
She got us organized and working in a much more coordinated way.
Mary set up shop in the basement and started working on the components of the shelves for my study.
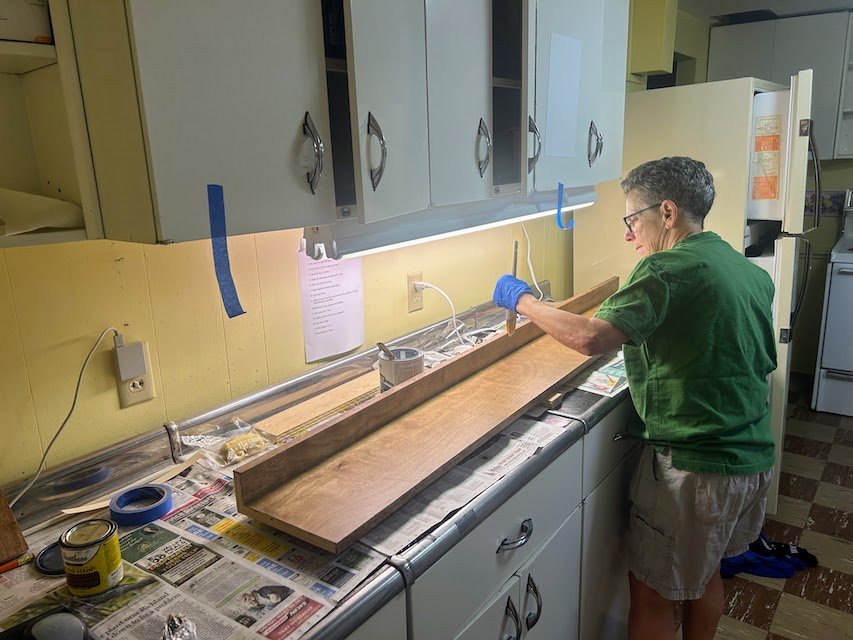
The bad news was that I couldn’t salvage the bottom shelf that had the red stain. I used a chemical stripper on the shelf and the two end pieces. After two applications, most of the stain was gone. But when Mary tried using the new stain, the finish on the shelf was cloudy. The end pieces turned out OK, but I had to rebuild the bottom shelf. (Good thing I bought that extra piece of plywood!)
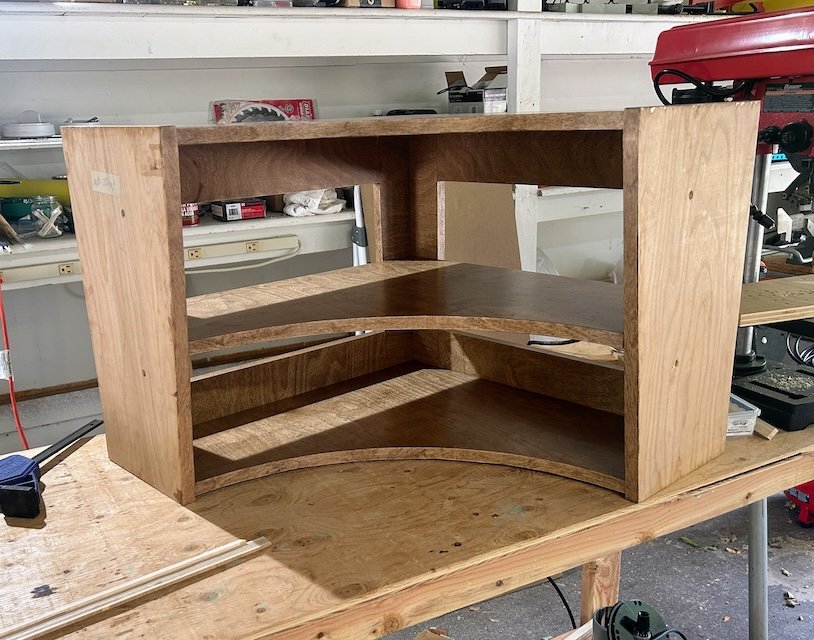
Assembling the bookshelves
Once the component pieces for my study had stain and poly applied, I started assembling the units. The corner cabinet was first. In the beginning it was slow and painstaking. I did a lot of head scratching as I tried to figure out the best way to hold the pieces in place so the units came out straight and square.
The design called for the top and bottom shelves to be set ⅛” below the top and bottom of the end pieces. So I had a handful of ⅛” strips of plywood to use as shims. I used every clamp I owned, and another one I borrowed from my son.

The pocket screws generally made fastening pieces together easier and more accurate. But occasionally a piece would shift under the clamps. I had to disassemble and rebuild one shelf when both ends went on crooked.
Every shelf unit also had regular wood screws used on the back and bottom sides, so holes had to be drilled.
But by the time I got to the last cabinet, I had the assembly process pretty well figured out.
Hanging the bookshelves
I spent a lot of time measuring and laying out how the bookshelves would be mounted to the wall. Using a stud finder, I marked the locations of the studs behind the drywall. I hung a ledger strip on the wall at the right height as a place to rest the back edge of the units.
Mary helped me get several hung. I’d set the shelf unit on the ledger strip and she would hold it in place while I checked that everything was level and then drilled the first hole for a mounting screw. I used 3” construction screws to fasten the units to the wall.

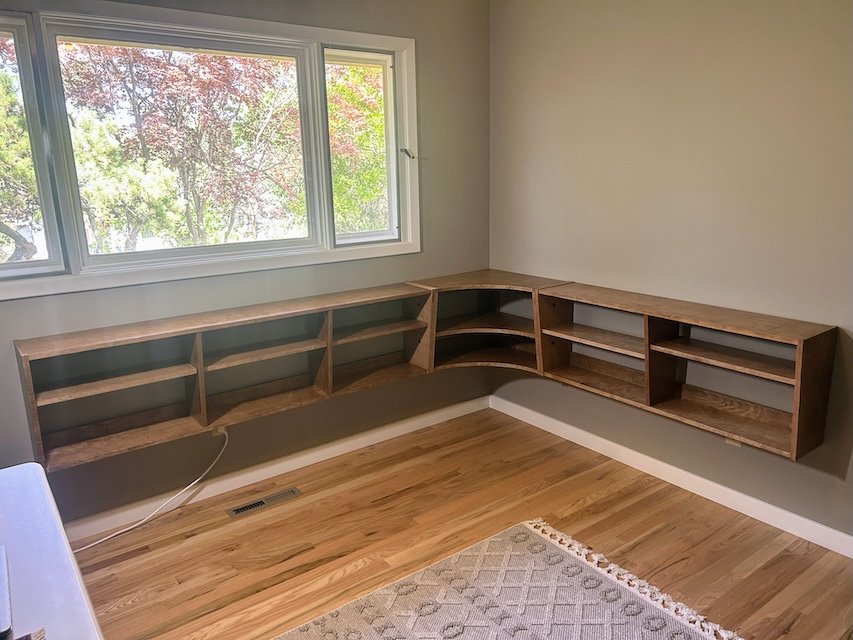
When mounting units side-by-side, I adjusted the end pieces so the edges lined up, clamped the pieces together, and inserted connecting bolts to hold them in place.
I hung the last unit in the living room on July 24th – just one week later than Mary’s target date.
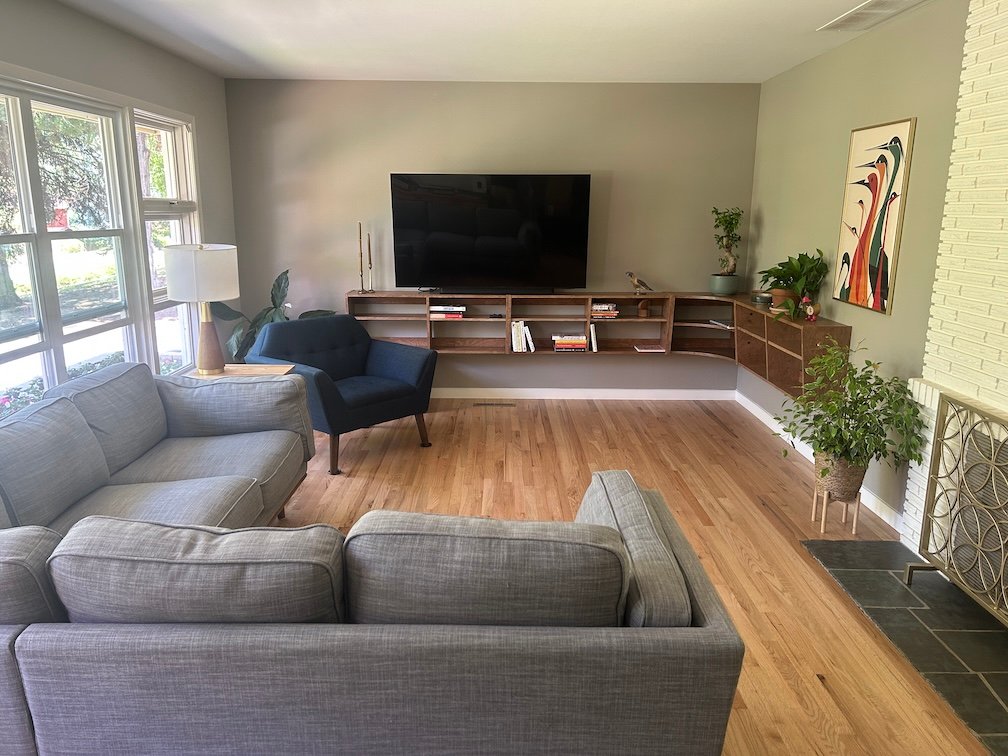
The end result
We’re both very happy with the way the bookshelves turned out. Sure, there are some imperfections and a few places where the fit or finish isn’t perfect, but I’m probably the only person that will see them.
I did a quick tally of the costs for the project. We spent just under $1,100 on materials and tools.
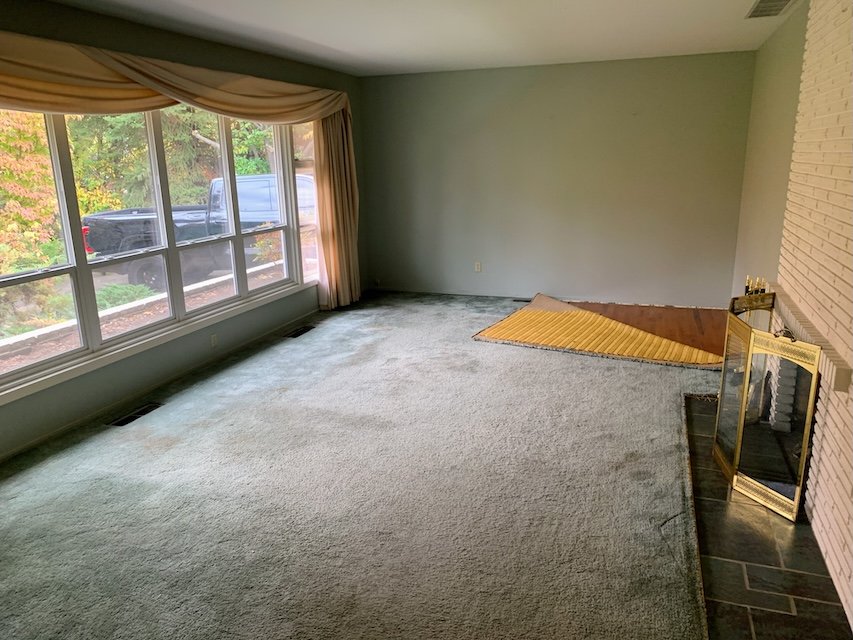
The transformation of our living room is almost complete now. A couple end tables and a rug should finish it off. Here are the before and after views.
The project was a great learning experience. And I’m already thinking about our next one.
Until next time,
Mary and Mike
The Cook and The Writer

What big project have you tackled this summer? Tell us about it in the comments below or via the Contact Us form. Send us photos and we’ll share them here.
Hi Mike and Mary –
The before and after photos say it all. Looks great!
It turned out beautiful Mike and Mary. We would not even have attempted that project….and Earl was trained as a woodworker in trade school. He worked with his father at a cabinet makers business before going into the Navy. He said he’s very impressed by what you accomplished.
Thanks, Alice and Earl!
Beautiful! Simply beautiful! Congratulations!!!
Thanks, Jayne!
I love the shelves! You put so much effort into every project! But where’s that pup?
Hi Bonnie,

Lily wasn’t much help with the shelves, but here’s a photo anyway.
Have a great week!
Mike
Mike and Mary,
Well done. Thanks for the laughs I kept saying to myself, “ Don’t do that, don’t do that.” Very glad you are getting settled into the new USA. All goes well here.
Hey Howard,
Glad we could provide some entertainment. Our best to you and Anne.
Mike
Great job Mike!! Coming from a former cabinet builder (me), that’s HIGH praises!! It really looks good in that room!! And good job on the PM, too! Only a week behind schedule isn’t bad. We’ve been dealing with a tree trimmer to finish taking down a 70′ tall maple tree in our back yard that had rotted in the middle. Going on 3 weeks now, but only about 8′ feet to go.
Hi Richard. Thanks for the high praise. It means a lot. Yes, Mary’s a pretty good PM. I hope your tree guy gets finished soon.
Wow! I don’t know what is more impressive: your ability envision a space; your painstaking research; your patience and perseverance; or your ability to just jump in and try new things. You are a great team. Miss spending time on our travels.
Debra
Thanks, Debra. I hope you and Keith are having a great summer. Where are you traveling next?
Wow, Mike and Mary! That was quite an undertaking. The outcome is impressive. A lot of time and effort went into making this happen. However, seeing the end product, it was well worth it. Thanks for taking us on your journey. I hope all is well in Idaho!
PS: The living room turned out great!
Hi Robert,
It’s great to hear from you. Thanks for commenting. We think it was worth it.
Our best to you and Jeffrey,
Mike
Mike, you all are more patience and willing to do the proper research than I’m willing to do. You do beautiful work.
My summer is repairing and repainting the pergola I built 10 years ago. Maybe proper planning and research back then would have prevented this.🤣😂😅
Thanks, John.
But don’t ding yourself about your project. Anything build from wood and erected outside in the elements is going to need maintenance and repair. Send a photo when you’re finished!
Mike
When you two create something new it always turns out quite lovely.
Miss you.
S+
Thanks, Sherod. We try our best.
Mike, I’m wordless! The only thing I can do is go to the bar downstairs and drink a “CANECA” to your health.
Hi Livio,
Please have TWO canecas for me! And say hello to Ivan, if you see him.
Mike
I am very impressed!
Thanks, Nancy!